Printing labels
Every planned plate can have a label: its name at the top, its barcode below, and the experiment and the user beside the barcode. Stick it on the dish's side, where it does not cover the agar the instrument looks through.
Printing
| Button | Prints |
|---|---|
| Printer | The label of the selected plate |
| Two printers | The labels of all the plates in the list, one after the other |
Labels go to the printer chosen with Printer Setup - Windows' default printer until you choose one - one label per page, which suits a label printer with labels the size of a page.
Settings
The fork-and-spoon button opens the settings, over the plate list; the red cross or the same button closes them.
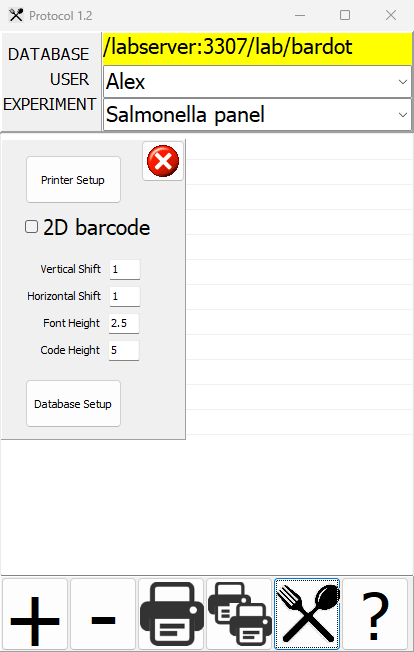
| Setting | Meaning |
|---|---|
| Printer Setup | Chooses the printer, and its paper and orientation. ExpManager remembers the printer |
| 2D barcode | Prints a DataMatrix code, small and square, in place of the usual Code 128 bar code |
| Vertical Shift, Horizontal Shift | The margins of the label's content, in mm |
| Font Height | The height of the text, in mm |
| Code Height | The height of the barcode, in mm |
| Database Setup | Opens the database Manager - see Connecting to a database |
The settings are kept as soon as you change them. Print one label to check them before printing a whole experiment: the barcode takes the width of the label left over by the margins, so the same settings suit only one size of label.
Reading the labels
The barcode holds the plate's barcode number, which BacBuster and ExpManager look up in the database. Any scanner that reads Code 128 - or DataMatrix, with 2D barcode - will do; see Barcode scanners for how to set it up.