The window
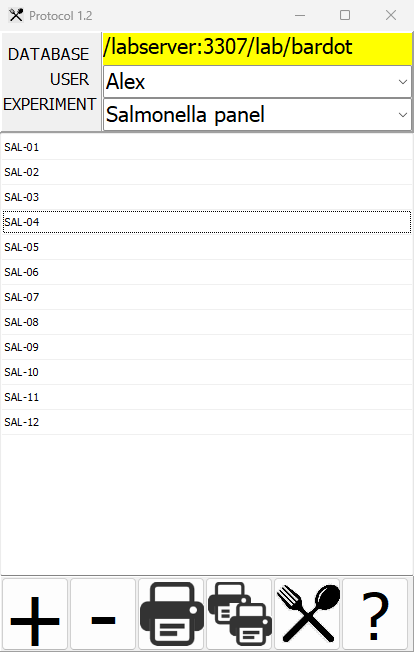
Database, user and experiment
The three rows at the top choose which plates are listed:
| Row | Meaning |
|---|---|
| DATABASE | The database, in yellow - for example /labserver/lab/bardot: server labserver, user lab, database bardot. Click it to choose another - see Connecting to a database |
| USER | Whose plates. The list holds the users of the database |
| EXPERIMENT | Which of that user's experiments. The list holds the experiments the user has plates in |
To start a new experiment, type its name into EXPERIMENT, and add its first plate: the experiment is created with it. A new user is made the same way, by typing the name into USER.
The plate list
The middle of the window lists the experiment's plates by name, one line per plate - planned or already scanned. Click a plate to select it for the buttons below. A plate whose barcode was just scanned with a barcode scanner shows in yellow - see Scanning planned plates.
The buttons
| Button | Does |
|---|---|
| + | Adds a plate to the experiment - see Planning plates |
| - | Removes the selected plate, if it has not been scanned yet |
| Printer | Prints the label of the selected plate - see Printing labels |
| Two printers | Prints the labels of all the plates in the list |
| Fork and spoon | Opens the settings: printer, label layout and database setup |
| ? | Opens this manual |
Hover over a button to see what it does. The buttons share the width of the window; make the window wider to make them larger.